Powering cross-channel configurable alerts with Knock
In this guide, we’ll cover some best practices in creating alerting-style workflows in Knock. Alerts are common in many types of infrastructure tools, like Datadog or Honeycomb, as well as in product management and data tools like Amplitude or Mixpanel.
Here are some assumptions we’ll make about configurable alerts for the purposes of this guide:
- The user should be able to pick the channels (like email, SMS, and in-app) that the workflow will use to notify recipients.
- The user can define the list of recipients who will receive these notifications.
- The user can also create additional dimensions to determine whether an alert should be triggered, like a list of event types or a particular usage threshold.
In the following steps, we’ll break down this process to help you understand how to create your own alerts. Since Knock can be used flexibly and adopted incrementally, we’ll examine two scenarios for how you can model alerts: modeling alerts in your system vs. modeling them in Knock.
Modeling alerts in your system
Let’s start with how you would power alerts modeled in your system using Knock to coordinate your cross-channel notification logic.
In the code sample below, you can see an example alert entity that might be stored in your database. After querying that entity, you pass the alert configuration and event type in the data payload for your workflow trigger and specify any recipients stored on the alert itself.
When you look at this code sample, you’ll see that there’s nothing fundamentally different about triggering an alert than triggering any other type of notification. You pass in data to be used in the workflow itself as well as all of the recipient references. You can then use the data in individual channel and function steps to drive the logic of your workflow.
In the next step of this guide, we’ll explore how you can offload more of this modeling to Knock, but it’s worth discussing the pros and cons of these two approaches.
Benefits of modeling in your system
Pros
- Your alerting data model lives in your system and remains the source of truth around alerts. In some cases, this may be a more natural place for it, depending on the data you’re storing and how you’re using the alerts in your system
- Less bookkeeping; the only call to Knock is when the alert is triggered
Cons
- Sending to a large number of recipients requires making multiple calls to Knock (recipients are capped at 1000 per trigger)
- You have to fetch and pass the alert object to Knock on every alert invocation
- More complex to send to a non-user recipient for a channel such as Slack or MS Teams
Benefits of modeling in Knock
Pros
- Knock manages all aspects of your alerting data model and becomes the source of truth for alerts and users subscribed to them
- Object subscriptions work well when you have a large set of recipients and don’t want to send the full list to Knock
- Simple to model non-user recipient channels (like Slack) that can be connected directly to the alert object itself
Cons
- More bookkeeping; you have to update Knock when a model changes or a user is added or removed from an alert
Since there is no one-size-fits-all approach here, you’ll need to weigh these pros and cons for your own use case to determine how much of your data model you want to bring into Knock. Knock works best when it’s loosely coupled to your system, so it’s helpful to consider how often your entities will change and how tightly your recipient lists are coupled with other parts of your organizational model.
Modeling alerts as Knock Objects
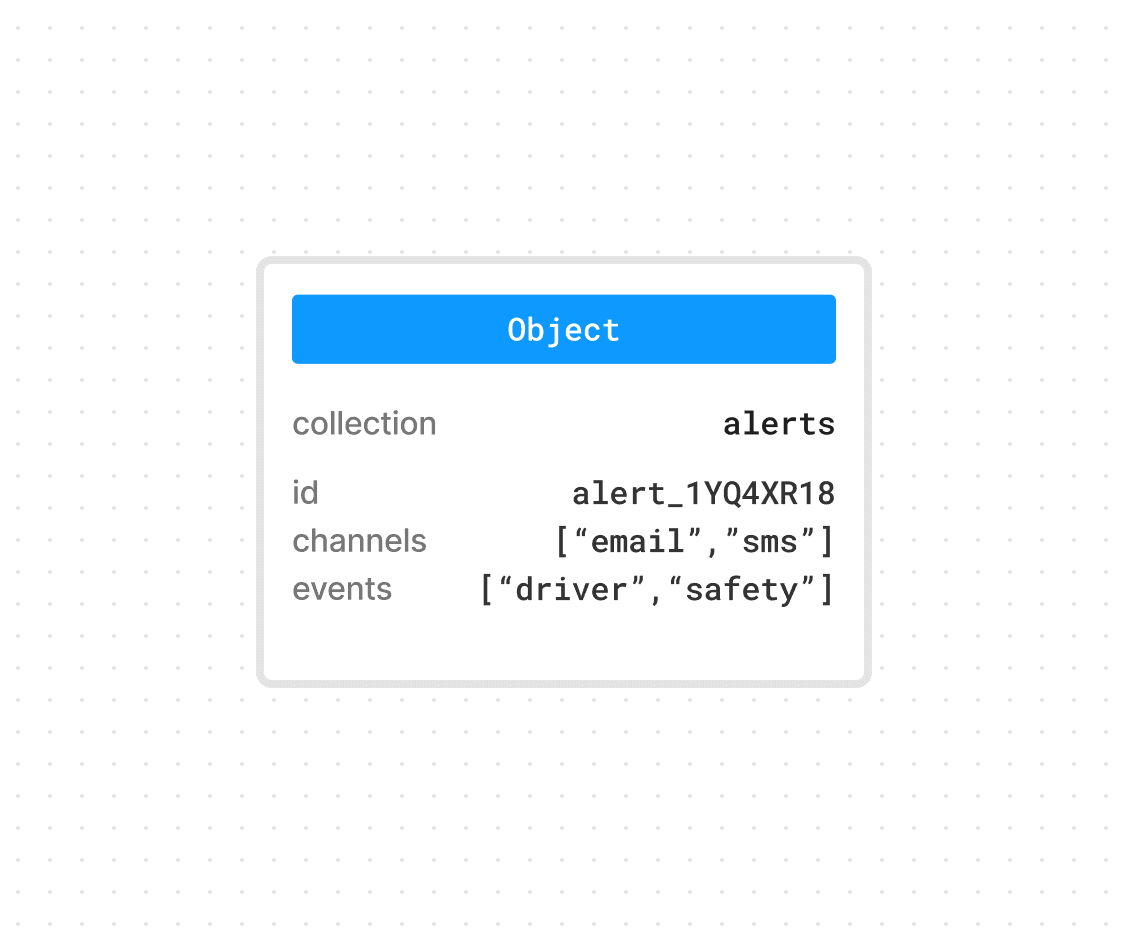
The first step in creating an alerting system with Knock as the source of truth involves modeling your alert as an Object. Objects allow you to represent non-user recipients and create a relationship with users through subscriptions, which we’ll cover in the next step.
Using custom properties, you can store additional information directly on the Object, like the channels that should be used in the alert, or the events that the alert is configured for. This allows you to encode the conditional logic of where and when a notification should send directly into Knock. Using the batchWindow property, you could even store a custom window rule on the alert object to represent how it should batch notifications.
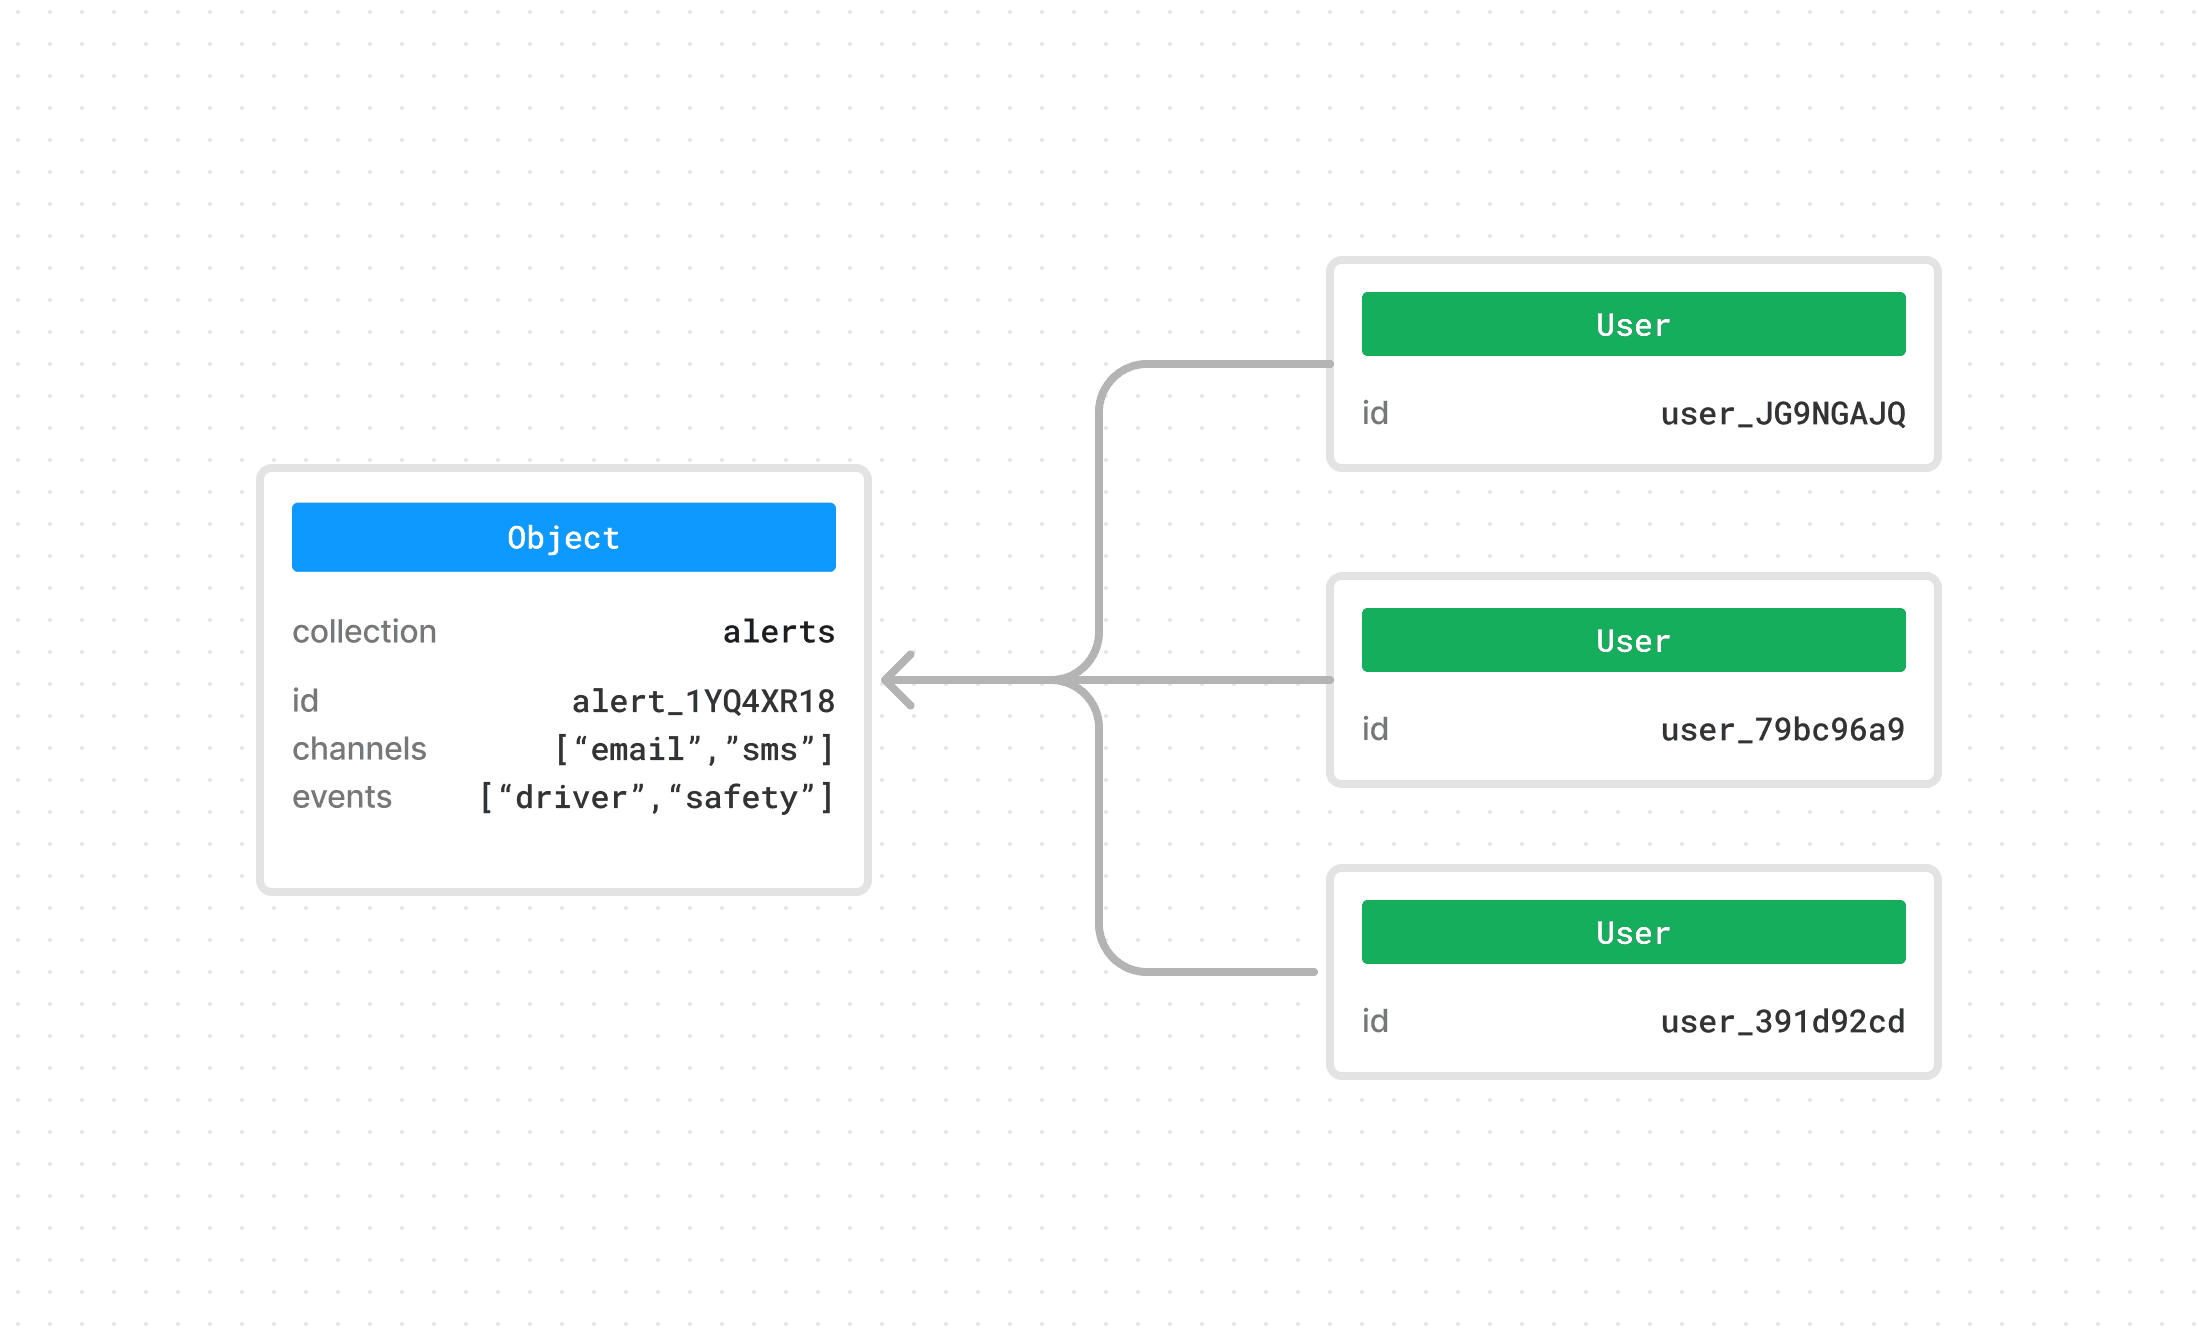
Subscribe Users to the alert
Once you have an Object modeled to store your alert data, you can add individual recipient subscriptions to your alert object. This allows you to fan out to an unlimited number of recipients while still triggering a single workflow.
Subscriptions can also hold their own unique properties that can be accessed during a workflow run. For example, users could select their own channels, events, or batchWindow if they wanted to and store them as properties of the subscription.
Triggering an alert
To trigger an alert workflow, your application would only need the id of the alert you want to trigger. From there, you would fetch the alert Object from Knock (we’re working on some ways to more easily reference objects inside of workflow runs).
Then you trigger the alerting workflow using the Object as a recipient. You’ll also want to pass the entire alert in the data payload as well as an event type.
When Knock processes this workflow run, it will run for the Object as a recipient and will also fan out to all of its subscribers and process a workflow run for each User. Since we passed in the alert and event as payload data, those values will be present on every recipient run of the workflow. That means we can access the properties stored on our alert object to make decisions about whether or not to send a notification on specific channels.
Modeling a workflow for alerting
Now let’s look at what a workflow might look like to support this use case.
A Knock workflow encapsulates a single type of notification in your system and comprises the cross-channel orchestration logic and associated behavior for how a notification should be sent to a recipient.
For our alert workflow, we find it’s best to have a single workflow that has all possible channels that an alert could be sent to. We can then use trigger conditions per-channel step to have a given alert's configuration determine whether a particular channel should be used for a given recipient.
Deciding whether to run the workflow
Since our application lets alerts subscribe to specific events, we’ll also want to ignore any events that the alert isn’t configured for.
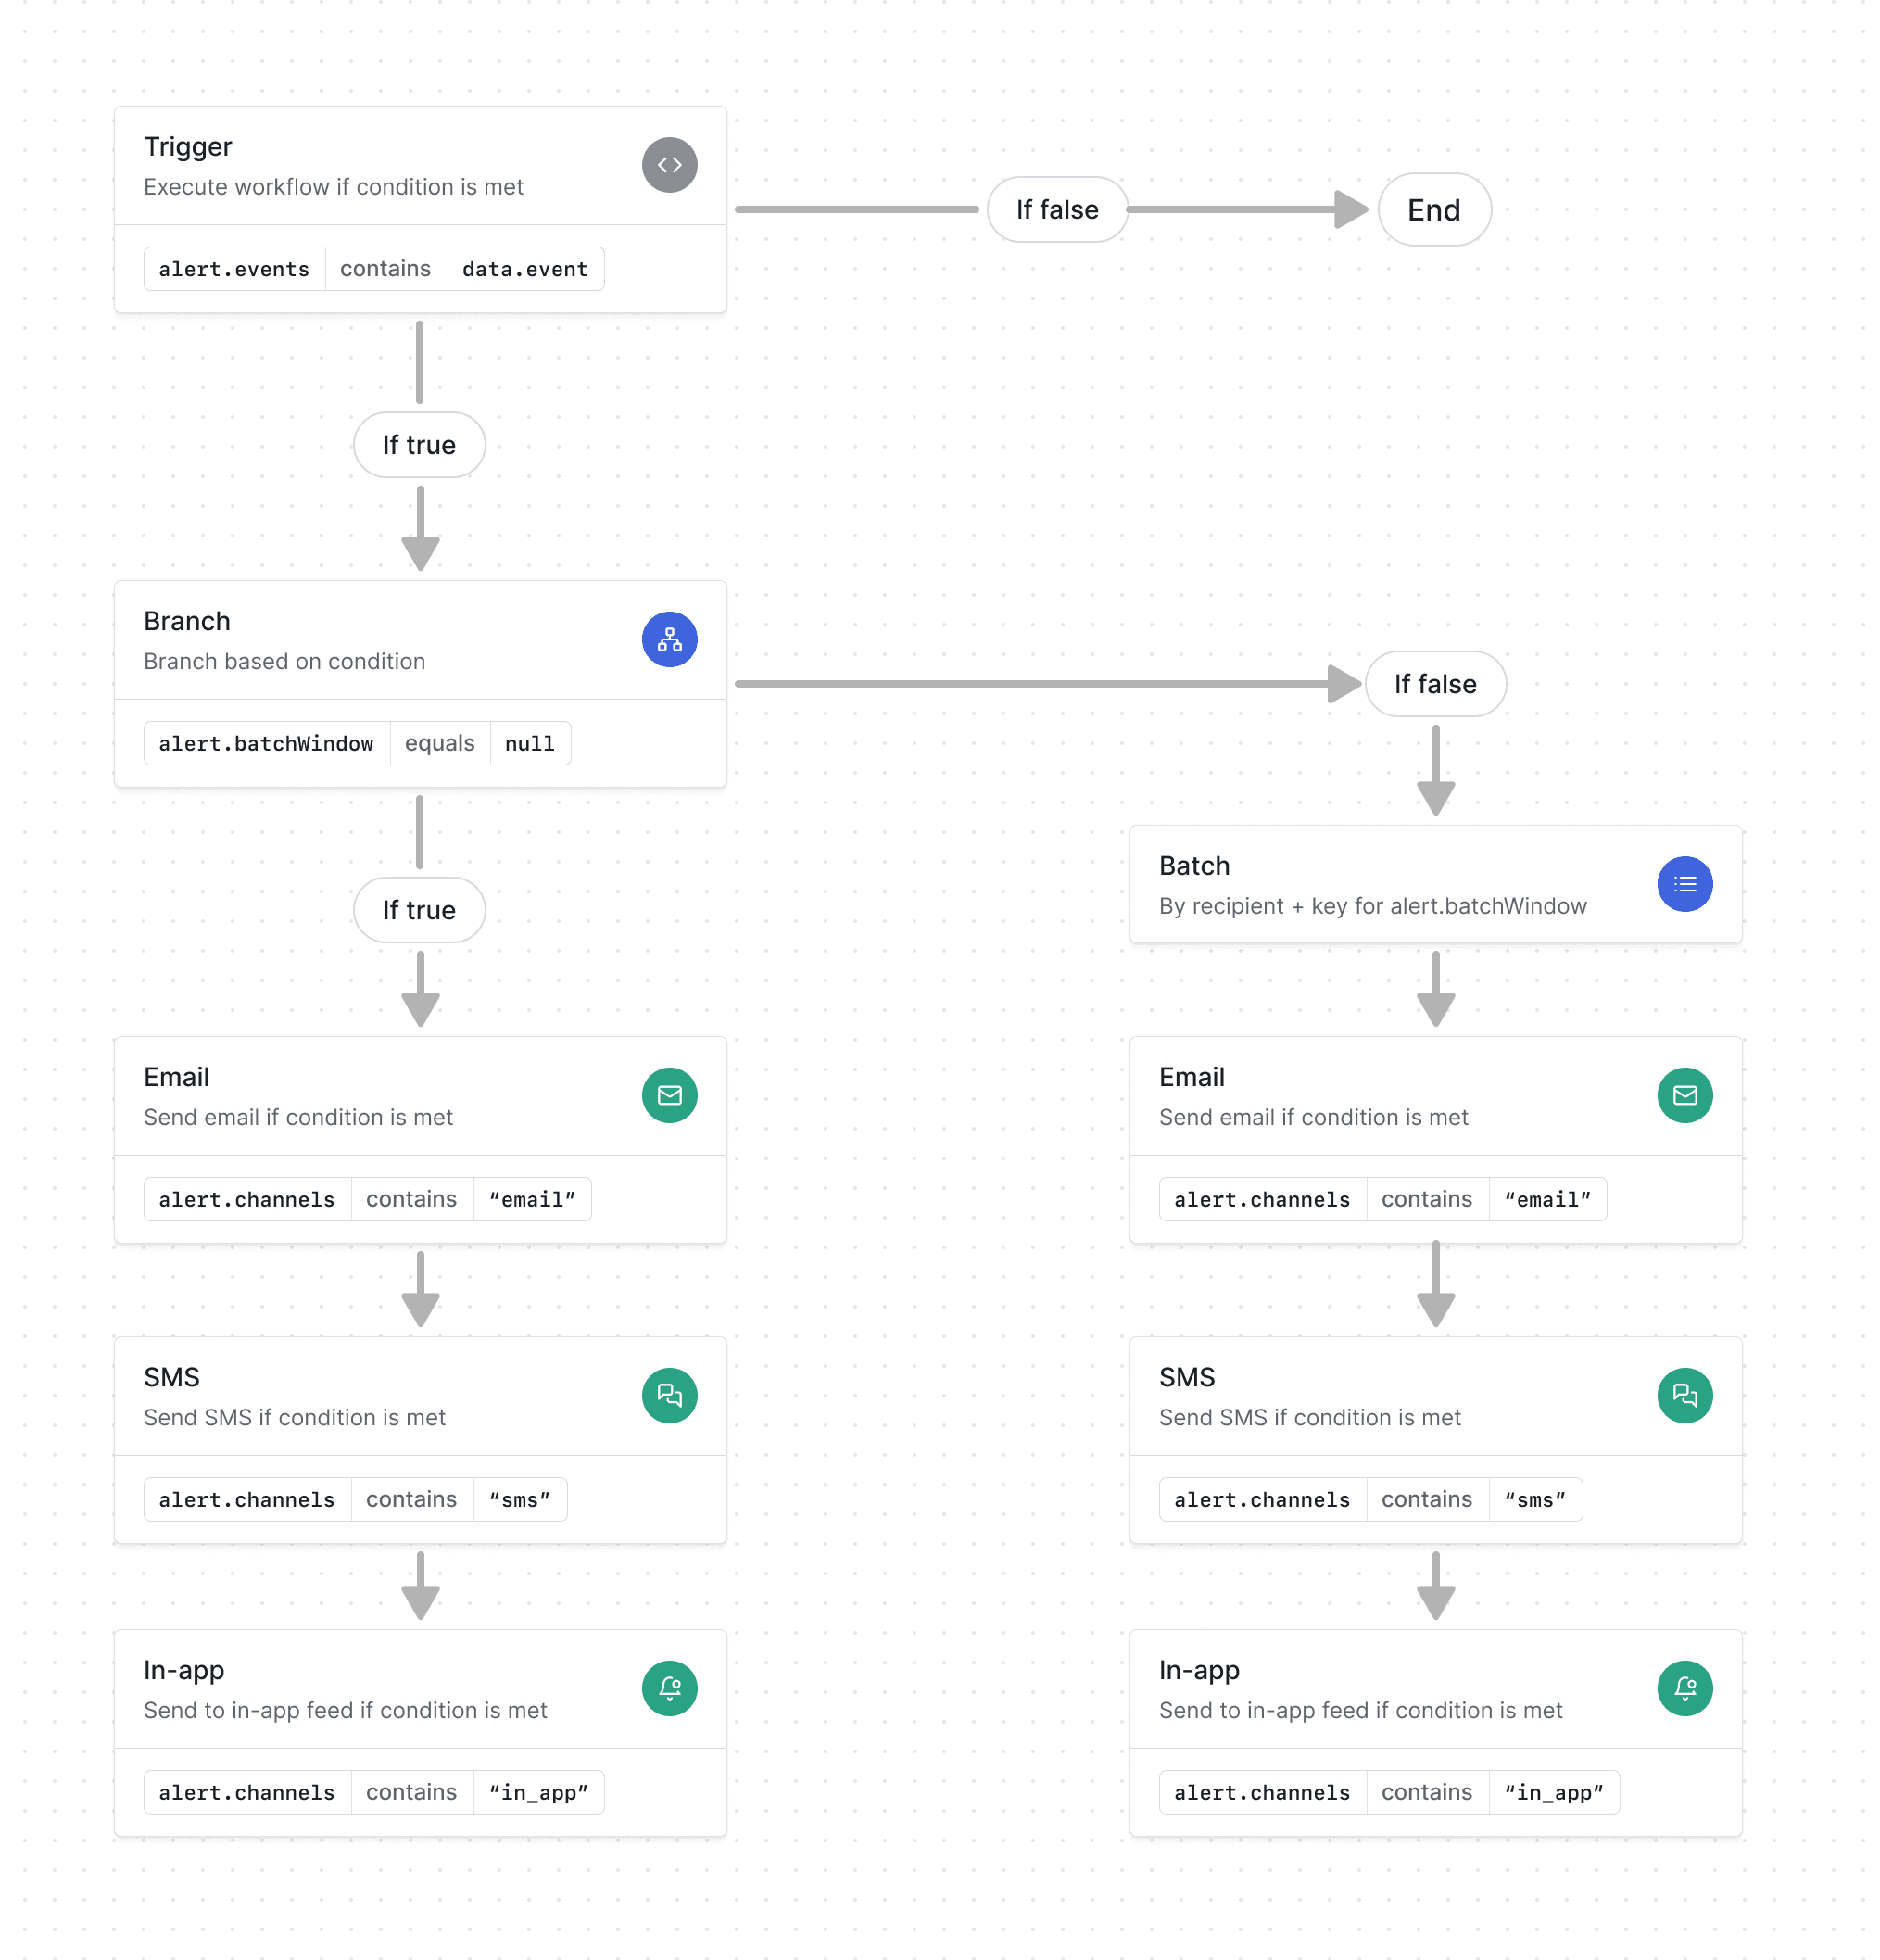
To do that, we can use a Trigger Step Condition to evaluate if data.alerts.events contains data.event. If it does, then we can continue to the next step. If not, we can halt the workflow immediately.
Knock’s conditions model is very expressive, so it’s also possible to represent conditions other than basic string matching. For example, if you had an alert property like usageThreshold you could create a greater than comparison to a piece of data in the payload.
Deciding when to send notifications
Next, we might want to either send notifications immediately or open a batch to catch multiple notifications of the same type. We can do that with a branch step, where we examine whether or not there is a value for the batch window in data.alert.batchWindow. If there is, we’ll proceed to a batch step. If not, we’ll execute channel steps immediately.
Deciding how to batch notifications
Let’s take a look at the batching example first. When using the batch function, Knock provides multiple ways to express when a batch window should close using a dynamic batch window. All batches are automatically created on a per-recipient basis, so in the case of a fan-out like we have here, a batch will be created for each recipient subscribed to the alert.
You might also want to create a particular batch per event type. You can do that by using a batch key, which in this case could be data.event. As you trigger alerting events in your app, Knock will use this key to open a batch per-recipient and per-event.
Deciding which channels to use
Lastly, let’s look at how you would decide which channels to send notifications to. When you configured your alert you stored an array of channels on the Object. As the workflow processes each channel step you can use a step condition to evaluate whether the current channel type exists in the array of configured channels: data.alert.channels contains "sms".
If that condition doesn’t evaluate to true, that particular channel step is skipped.
Interacting with user preferences
Up until now, much of the configuration on when and where to send notifications has existed in the alert object we created. But since users have preferences as well, it’s possible that those preferences interact with some values configured in the alert itself. For example, even if the alert is configured to send email, if a user has opted out of the email channel, they will not get that notification.
There are a few ways to look at preferences in this context:
- Developers control which preferences are exposed to the user, so it’s worth considering how you want to create a preference center and at what level of granularity you want users to be able to opt out. For example, you may just never want to expose global
channel_typepreference settings and instead exposeworkfloworcategorysettings. In this case, just omitting a setting for your alerting workflow means users can’t opt out. - Developers can always override user preferences at the workflow level in the dashboard. Enabling this option means that every message sent from that particular workflow will override preferences set by the user.
- You can always examine the preferences Knock evaluates on a given recipient in the workflow debugger.